CYBERCAFE MANAGEMENT SYSTEMS VERSION 2.0
TABLE OF CONTENTS
Statement of Agreement
*Credits and References
*Introduction
*Program Features
*Windows and Explanation
*Server Section
*About Window
*Main Window
*Usage Section.
*Charges Window
*Analysis Report Form
*Explanation of the Listed Report
*Client Section
*Installation Procedure
*Setting Up
*Server Set Up
*Setting up the display
*Client Set Up
*Database Browsing
*Feedback
*
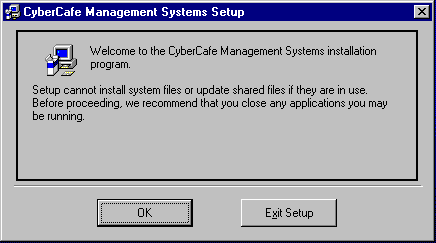
This program is a proprietary of LangNet Enterprise 2000. Any reduplication or redistribution of this program is strictly prohibited. By purchasing this program you are prohibited to make copies and distribute it without written consent of LangNet Enterprise. LangNet Enterprise will not be held responsible with any system whether Window 95, Window 98 or Window NT corruption. This program did not hold any hidden viruses and do not have any damaging program toward user operating systems. LangNet Enterprise will also held no responsibility on usage without proper schedule stated in this document. By following the procedures in this document, there should be no problem occurs with this program.
Systems Design and documentation’s………………………………………………...Iskandar Hussein
Coding improvements………………………………………………………………...Wan Hasnibi
Marketing Strategy and Packaging…………………………………………………...Iskandar Hussein.
Security and License………………………………………………………………….Wan Hasnibi
Prototyping and Design Improvement………………………………………………..Iskandar Hussein.
Logistic and Local Marketing………………………………………………………..Chok Keri.
Web Design and Electronic Marketing………………………………………………Zaidi Dohat.
The CyberCafe Management System is a utility that monitors the usage of each client. It is a simple program that records all the usage and collection of a cyber café. There are two parts in this program set. One is the client set and the other is the server set. The client set is stored in the client PC while the server set is stored in the PC Server. Both set need to be installed in order for the program to run. This document will explain in detail on identifying some of the features that this program can offer and how to utilize this program at utmost usage.
We will discuss this segment into 2 section, the server section and client section.
In this server section there is 4 windows that will appear in the chronological order. Each window will activate once other windows been deactivated. Each window performs different functions. Below are the explanations of each window:
This about window is the startup window, every time this program executed, this splash screen window appear first. The contents of this about window are:
This window will only appear until you click OK button on the form. Once you hit the OK button, this window will be deactivated and another window will come to the screen. The name of this window is the main window.
This main window has two sections. License Registration Sections and Usage Section.
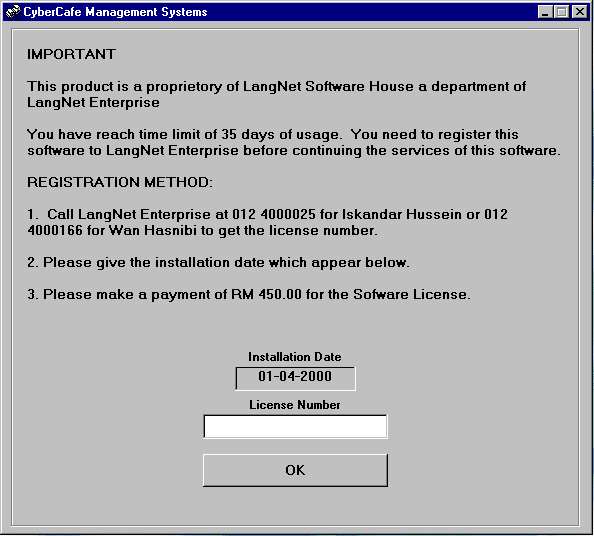
The window will show once the program resides in the hard disk for 35 days without license number. When this happen, call the number stated on the window for Iskandar Hussein or Wan Hasnibi for the release of the valid license number. Remember to make payment of RM 450.00 before you get the license. The license is only for 9-user license. The charge for each client is RM 50.00. The license for more than 9 client together with the patch program will be release once you make payment for the license. As to make the package interesting. The client license of more than 9 client will be given a discount of RM 30.00 for each license in addition to the 9 client licenses. Do not forget to mention the installation date to get the valid license.
Once you entered the user license, hit OK to move to the usage window.
The usage section is the main window that will be use heavily by the user. The preliminary program will come as 9-client license. More the 9-client license is available upon request. Below is the display of the usage section.
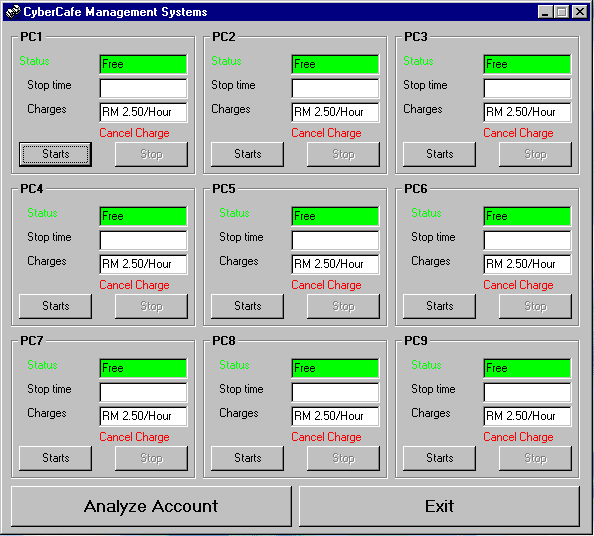
This is the layout of the usage window. The top title will display the "CyberCafe Management Systems"
Below are the features on this window:
By clicking on the start button or client double click on moving icon on client lock page, the current time will be captured and label caption change from "Status" to "Start Time".
By clicking on the stop button the current time will be captured and another window will appear stating the current usage and charges of the client ant the display for the client PC will be lock.
Cancel Charges occurs when the customer does not want to use a particular client and want to move to another client or operator doesn’t want to charge the client. By double clicking the "Cancel Charges" label, the charges will be cancel and the display on the client will be lock and no record in database.
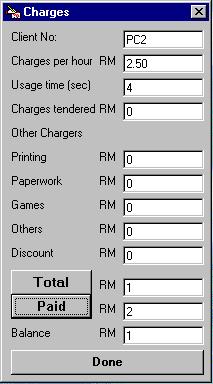
Charges windows will appear when the user clicked on the stop button. The window will look like this.
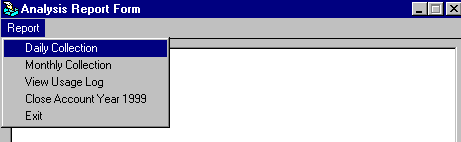
In the usage window, there are two button, analyze button and the exit button. If the user clicks the Analyze Button, an analysis report form will appear and the form will be looking like the illustration in below.
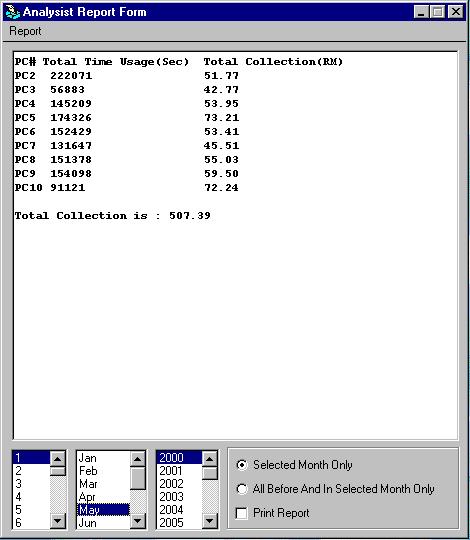
In the analysis report form the display will show type of report below:
Explanation of the Listed Report
The first row of the Report pull down menu is the "Daily Collection Report". Daily Collection Report shows the collection for the selected day. Below are the explanation of each the of the row listed under Report Pull Down Menu.
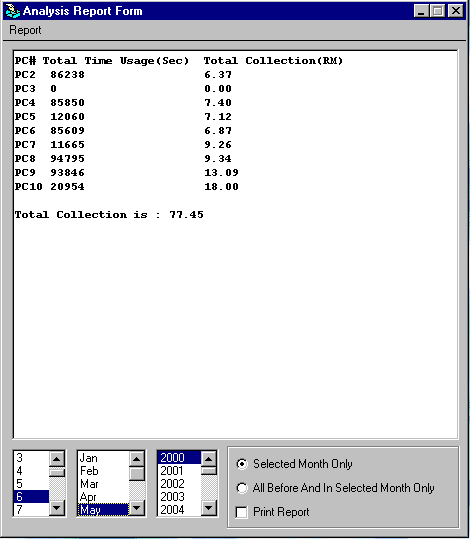
Note: Do not open Window Explorer and open the usagelog.txt or analyze.txt file while the program is running. The display report will show an empty space if you do that. To solve this problem in the event you opened the usagelog.txt and analyze.txt, is to close the program and restart back the startup process on both server and client side.
The explanation ends the server side, in the next section we will discuss about the client side of the program.
The client section involves 2 forms. These two forms are namely, the client form and the login form. There are not much utility available on both forms. The Client form is shown below:
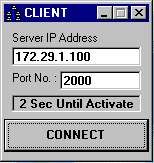
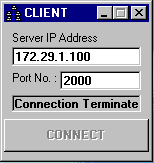
Once the connect button clicked or after 10 seconds, display-locking window will appear. It is just the display that covers the screen. The display has a moving label icon "Double Click On Me To Login", that need a double click action in order to open up the display for browsing and other computer usage activities.
The display could be change with any picture since it used bitmap picture format. You can also design your own bitmap and change the display design by naming the picture name "lang.bmp".

![]() Once the label is double click the display-locking window will be disappear and there will be a working timer at the task bar, client will be able to view their usage during their work on the PC.
Once the label is double click the display-locking window will be disappear and there will be a working timer at the task bar, client will be able to view their usage during their work on the PC.
We have learned about the windows, now we will learn how to install the program.
Below are the steps and procedures:
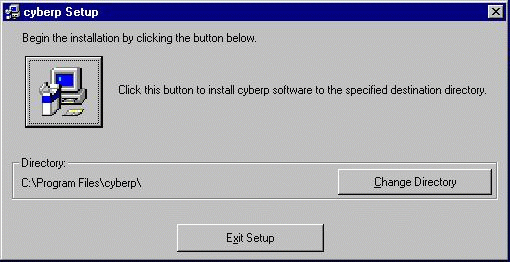
The server program should be run first before running the client program.
There is file that you need to fill in before starting the program. The filename is "config.txt". The input that need to be typed are:
Below are how the input looks like.
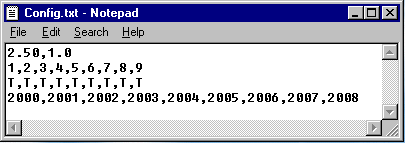
If you notice the figure 2.50 stands for usage rate for one hour. The figure 1.0 is the rate for minimum charges for usage less than an hour. The figures 1 through 9 in second line are PC numbers. The figures in third line are frame-enabling setting. The figures 2000 through 2008 in fourth line are the port numbers.
You only have to change the numbers and save the notepad filename as it is.
You have to set the regional setting which is located under control panel. To activate the setting, go to control panel and choose the regional setting. The regional setting properties window will appear and at the upper tab choose "Date".
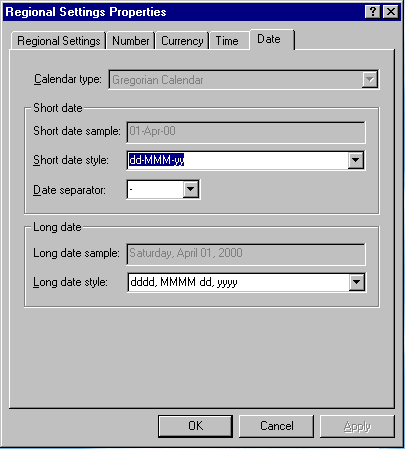 Go to short date text box and change the date format to this format "dd-MMM-yy" View the example for further understanding.
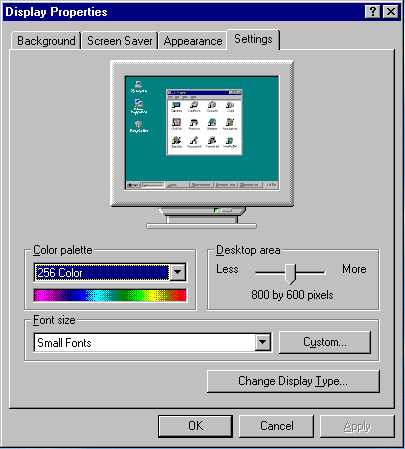
The display setting for the program to be better presented should be as below.
In client set up there is a filename "svr.txt". In the file below are the input needed for "svr.txt":
Below is the display for the "svr.txt" file.
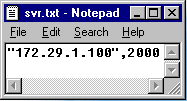
The entry "172.29.1.100" is the IP address of the PC Server. While the figure "2000" is the port number. The port number for each client PC should be different port number. The port number has been set up during the PC Server setup.
Note: All the set up should be done in Window Explorer Environment.
All the collection made is record in the file name usagelog.txt.
Below is the database sample.
13

First string is date then PC number then third string is total usage in second and last string is charges. If changes need to be make to the database please make sure there is no empty line and cursor at the fist row on the last line before the file is save.
For feedback on the upgrades or improvement feel free to call the developers, Iskandar Hussein and Wan Hasnibi, at 012 4000025 and 012 4000166. User can also join the user group at www.langnet.com.

Langnet Enterprise
No. 3, Tingkat Bawah Arked Mara
Pusat Bandar, Kuah, Langkawi
07000 Kedah Darual Aman
Malaysia.
Telephone: +6012-4000025
e-mail: [email protected]
Information in this document is subject to change without notice, and does not represent a commitment on the part of Langnet Enterprise.
Microsoft Windows, Microsoft Windows NT, Microsoft Windows 95 and Microsoft Windows 98 are trademarks of Microsoft Corporation.
All trademarks and copyright mentioned in this documentation are the property of their respective owners.